.png)
A cute Easter magnet
- Leda Ottaviano
- Apr 14, 2021
- 2 min read

GENERAL INFORMATIONS:

TIME: 2h 30min

DIFFICULTY: high-medium

COST: medium
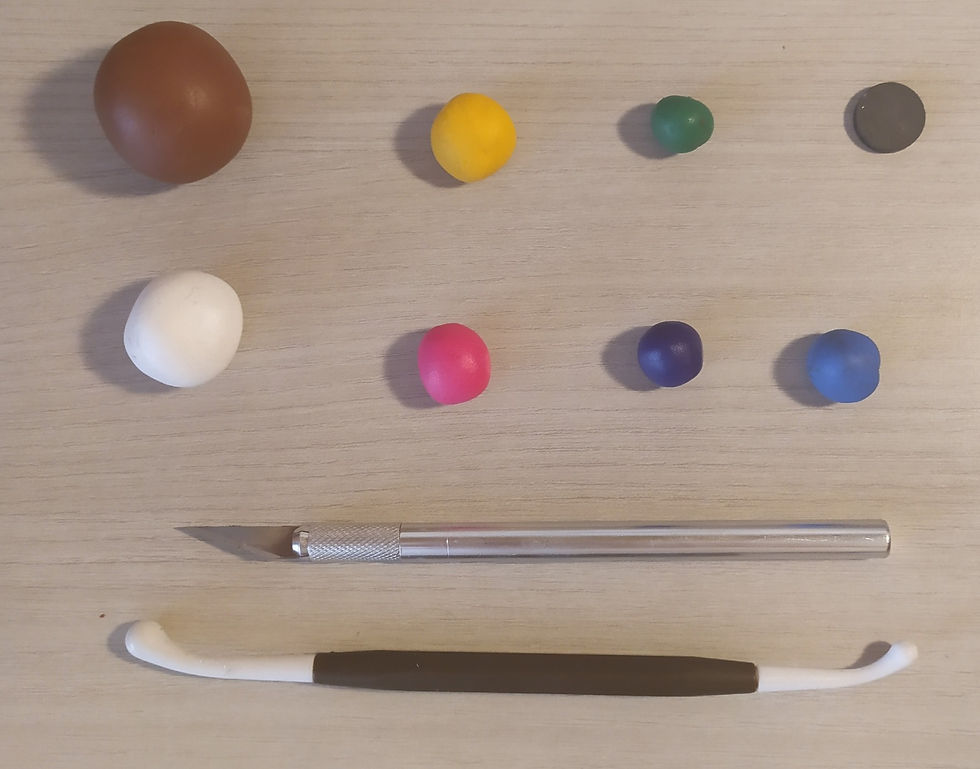
INGREDIENTS:
a bit brown polymer clay
a bit pink polymer clay
a bit blue polymer clay
a bit yellow polymer clay
a bit parple polymer clay
a bit green polymer clay
a bit black polymer clay
a bit red polymer clay
a cutter
ball tools
a magnet
hot glue gan
a hot glue refill
Especially if it isn't new, the polymer clay could be quite hard, so take some time to soften it, manipulate it until you realize that it no longer cracks and that it bends easily.
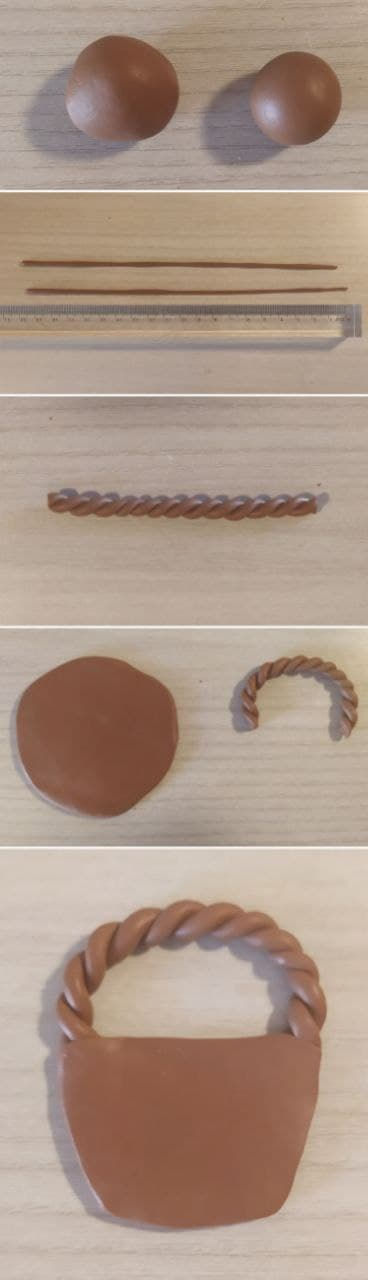
Take the brown fimo and divide it into two parts about one the 1/3 of the other. The largest will be used to make the basket, while the smallest will be used for the handle.
Take the smaller part and make two "snakes" about 20 cm long. I advise you to start from the center and go outwards to make the snake more uniform.
If you want to make it a little longer you can. Rememer: if it is too long you can always cut it, but if it is too short then you have to re-start.
Now roll them together creating a twist. Like this ->
Take the larger part of brown clay and make it flat.
Using a cutter, cut out a shape similar to a trapezoid with rounded corners.

Curve the twist slightly and place the shape you just cut over it, press lightly into the seams to make the pieces stick together and adjust the shape until you achieve a satisfying result.
Remember to check often that everything detaches from the surface you are working on, otherwise you risk having to start all over again.
with the help of a ruler cut strips about 0.4 cm wide, the length does not matter, as long as they are longer than the basket.
starting from one of the corners, cross all the strips together, as in the image on the side.
cut the extra part and arrange the strips making them adhere well to the underside.

if you want, with a stick you can add details to make the basket as similar as possible to a real basket.
totally optional, you can add some decorations like the ones in the example.
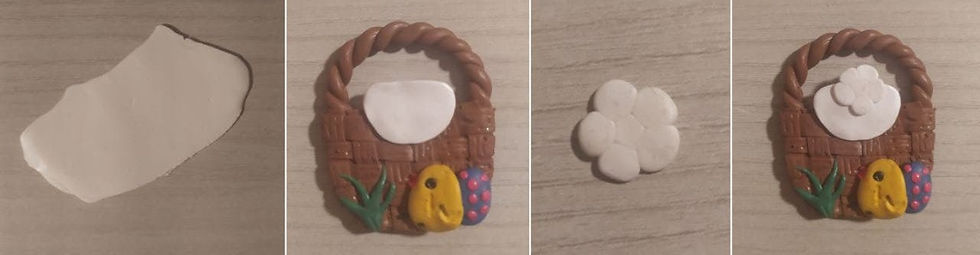
Now with the white clay you have to create a bunny.
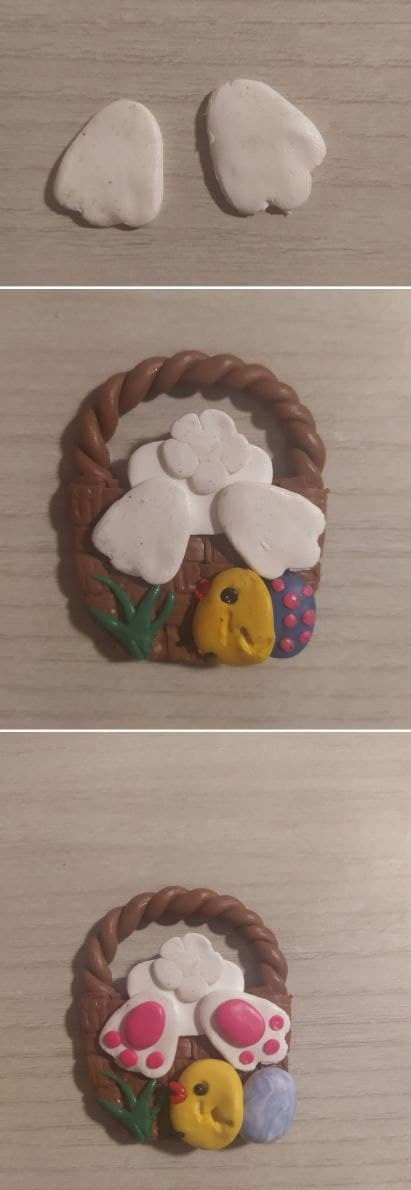
So: roll out the clay and divide it into two pieces; a piece you will use to make the rabbit's butt, while the rest for the legs and tail.
During the drafting remember the precautions from before.
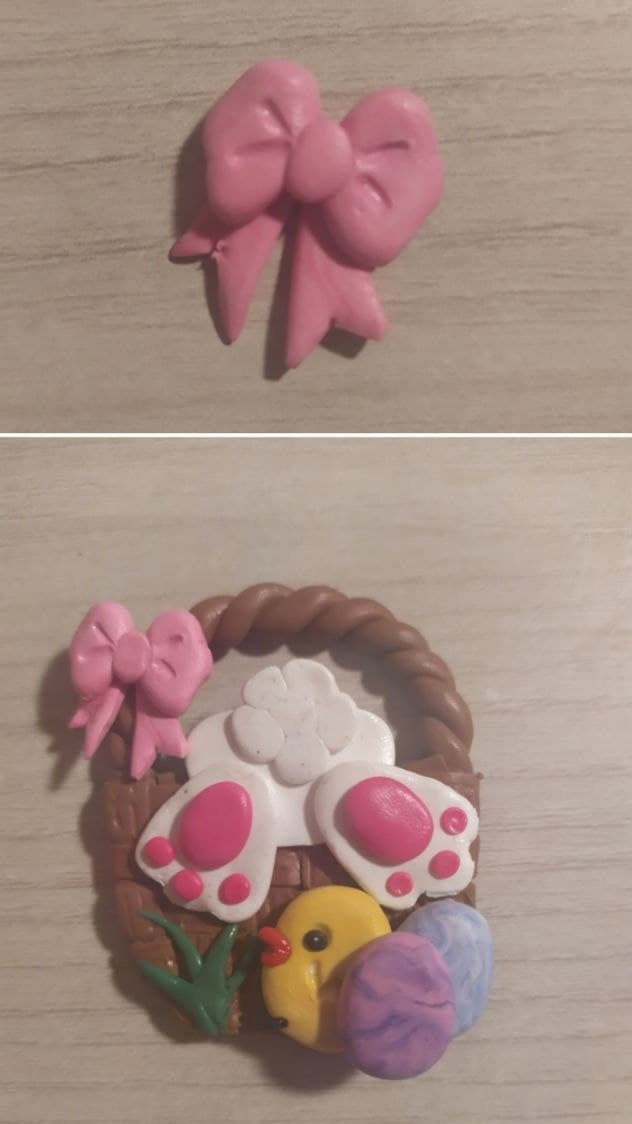
After having cut out the various parts, place them slowly on the basket you made before and fix them by tapping with your fingers.
With the pink clay you can add the details of the rabbit's legs by simply making balls and squeezing them.
Bake in the oven for 30 minutes at 150 °.
Let it cool and with the help of hot glue put a magnet behind it.
That's all. Hope you enjoy using it.

This is so CUTE!!!😍