.png)
PEARL BEADS: what are & how to use it
- Leda Ottaviano
- Feb 18, 2021
- 3 min read

Updated: Apr 12, 2021
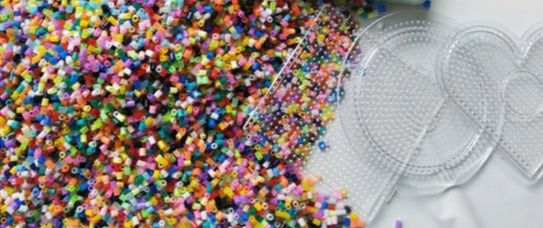
Pearl beads are colored tubular beads, also known by the name of Pyssla or Hama beads (names of the major distributors of this product), they can not only be used as normal beads, but rather, thanks to the help of specially made grids, the warmth of the iron and a lot of imagination allow you to build an infinite number of colored plastic projects.
In this post I will explain step by step how to do it and I will tell you all the tricks to ensure that your work is perfect. So lets start!
Buy the beads: to start, the Ikea's 13,000 beads jar, called pyssla, is fine, going forward, however, it will be better to buy other brands, because those of Ikea have the problem of being very thin and therefore sometimes when you go to ironing the work risks being ruined. Other very valid alternatives with decidedly affordable prices are those of Flyng Tiger Chopenagen, or those of the Hama beads brand that can only be purchased online. Remember that to prepare your projects you will also need grids, baking paper and an iron. If you have the possibility, also some eyebrow tweezers that will help you to better arrange the beads.
Divide by colors: (totally optional) even if it is not mandatory, often the beads are sold with the colors all mixed, dividing them immediately after buying the package will allow you not to waste unnecessary time in the future and will also help you understand when you are about to finish a color.
Think about a project that you want to carry out: after deciding what you want to do with the beads, what I recommend you do is a sketch of a pixel drawing on a squared sheet, so that each square corresponds to a bead to be placed on the grid. If you need some inspiration you can also visit the template section of my site where you will find many of my projects divided by categories, I leave you the direct link here.
Start placing the beads on the pegboard: now that you know exactly which beads you will need to use and where you will need to use them, all you have to do is place them on the pegboard and compose your design.
When you heve finished your artwork, you could chose if you wont to keep it or if you just wont to meke another one. If you would like to keep your design, the beads can be ironed together. This slightly melts each bead to the next at one end, so the complete design can be removed from the pegboard as one. Remember both pegboards and ironing paper can be reused, if you don't whant to by the ironing paper you could also use baking paper as well.
Ironing instuctions
Before you begin: Please note that ironing must be done by an adult or a supervised child. The exact temperature may vary from iron to iron, but the “cotton” setting is generally recommended. Make sure that every bead is beside another. The more beads that surround a single bead, the stronger the final design will be.
When you are ready: Place ironing paper over the completed beads design. Apply the iron to the ironing paper for a few seconds using smooth, circular movements – never hold the iron completely still. The colour of the beads will become more clearly visible through the ironing paper as they melt.
Carefully remove the ironing paper, but leave the beads design to cool for a couple of minutes before removing it from the pegboard, possibly with a weight on it (like a heavy book, a vocabulary ...)
Repeat the process if necessary
Now that you know all the secrets to using beads at their best, have fun creating all the designs you prefer.

Comments